영상파일 처리
- cv2.imread(filename[, flags]) : 지정한 영상파일로부터 영상을 적재한 후, 행렬로 반환
- filename : 적재할 영상 파일 이름
- flags : 적재한 영상을 행렬로 반환될 대 컬러 타입을 결정
- cv2.imwrite(filename, img[, params]) : image 행렬을 지정한 영상 파일로 저장
- filename : 적재할 영상 파일 이름
- img : 지정하고자 하는 행렬 영상
- params : 압축 방식에 사용되는 인수 상 (paramid, paramValue)
행렬 컬러 타입 결정 상수
- cv2.IMREAD_UNCHANGE (값 : -1) - 입력 파일에 저장된 타입의 영상을 그래로 반환 (알파 채널 포함)
- cv2.IMREAD_GRAYSCALE (값 : 0) - 명암도(grayscale) 영상으로 변환하여 반환
- cv2.IMREAD_COLOR (값 : 1) - 컬러 영상으로 변환하여 반환
- cv2.IMREAD_ANYDEPTH (값 : 2) - 입력 파일에 정의된 깊이(DEPTH)에 따라 16비트/32비트 영상으로 변환, 설정되지 않으면 8비트 영상으로 변환
- cv2.IMREAD_ANYCOLOR (값 : 4) - 입력 파일에 정의된 타입의 영상을 반환
import cv2
from matplotlib import pyplot as plt
def print_matInfo(name, image):
    if image.dtype == 'uint8':     mat_type = "CV_8U"
    elif image.dtype == 'int8':    mat_type = "CV_8S"
    elif image.dtype == 'uint16':  mat_type = "CV_16U"
    elif image.dtype == 'int16':   mat_type = "CV_16S"
    elif image.dtype == 'float32': mat_type = "CV_32F"
    elif image.dtype == 'float64': mat_type = "CV_64F"
    nchannel = 3 if image.ndim == 3 else 1

    ## depth, channel 출력
    print("%12s: depth(%s), channels(%s) -> mat_type(%sC%d)"
          % (name, image.dtype, nchannel, mat_type,  nchannel))
title1, title2 = "gray2gray", "gray2color"      # 윈도우 이름
gray2gray  = cv2.imread("img/read_gray.jpg", cv2.IMREAD_GRAYSCALE) # 영상 파일 적재
gray2color = cv2.imread("img/read_gray.jpg", cv2.IMREAD_COLOR)
if (gray2gray is None or gray2color is None) :  # 예외처리 -영상 파일 읽기 여부 조사
    raise Exception("영상파일 읽기 에러")
# 행렬 내 한 화소 값 표시
print("행렬 좌표 (100, 100) 화소값")
print("%s %s" % (title1, gray2gray[100, 100]))
print("%s %s\n" % (title2, gray2color[100, 100]))

print_matInfo(title1, gray2gray)
print_matInfo(title2, gray2color)
행렬 좌표 (100, 100) 화소값
gray2gray 106
gray2color [106 106 106]

   gray2gray: depth(uint8), channels(1) -> mat_type(CV_8UC1)
  gray2color: depth(uint8), channels(3) -> mat_type(CV_8UC3)
r, g, b = cv2.split(gray2color)
gray2color2 = cv2.merge([r, g, b])
plt.imshow(gray2color2)
plt.xticks([])
plt.yticks([])
plt.show()
실행 결과에서 보듯이 gray2color 행렬은 명암도 영상파일을 3채널 영상으로 만들었기 때문에 BGR 의 모든 채널 값이 동일하다. 따라서 명암도 영상과 같은 색으로 보인다
영상파일 읽기(컬러)
import cv2
from matplotlib import pyplot as plt
def print_matInfo(name, image):
    if image.dtype == 'uint8':     mat_type = "CV_8U"
    elif image.dtype == 'int8':    mat_type = "CV_8S"
    elif image.dtype == 'uint16':  mat_type = "CV_16U"
    elif image.dtype == 'int16':   mat_type = "CV_16S"
    elif image.dtype == 'float32': mat_type = "CV_32F"
    elif image.dtype == 'float64': mat_type = "CV_64F"
    nchannel = 3 if image.ndim == 3 else 1

    ## depth, channel 출력
    print("%12s: depth(%s), channels(%s) -> mat_type(%sC%d)"
          % (name, image.dtype, nchannel, mat_type,  nchannel))
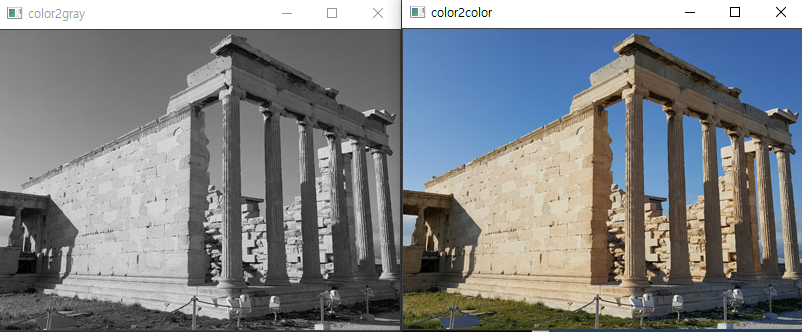
title1, title2 = "color2gray", "color2color"
color2gray = cv2.imread("img/read_color.jpg", cv2.IMREAD_GRAYSCALE)
color2color = cv2.imread("img/read_color.jpg", cv2.IMREAD_COLOR)
if color2gray is None or color2color is None:
    raise Exception("영상 파일 읽기 에러")
print("행렬 좌표 (100, 100) 화소값")
print("%s %s" % (title1, color2gray[100, 100]))     # 한 화소값 표시
print("%s %s\n" % (title2, color2color[100, 100]))
행렬 좌표 (100, 100) 화소값
color2gray 137
color2color [197 145  98]
print_matInfo(title1, color2gray) # 행렬 정보 출력
print_matInfo(title2, color2color)
color2gray: depth(uint8), channels(1) -> mat_type(CV_8UC1)
color2color: depth(uint8), channels(3) -> mat_type(CV_8UC3)
r, g, b = cv2.split(color2color)
color2color2 = cv2.merge([r, g, b])
plt.imshow(color2color)
plt.xticks([])
plt.yticks([])
plt.show()
위와 같이 색이 변하여 나와서 해결방안 찾아야된다.
cv2.imshow(title1, color2gray)
cv2.imshow(title2, color2color)
cv2.waitKey(0)
영상파일 읽기 (비트)
import cv2
from matplotlib import pyplot as plt
def print_matInfo(name, image):
    if image.dtype == 'uint8':     mat_type = "CV_8U"
    elif image.dtype == 'int8':    mat_type = "CV_8S"
    elif image.dtype == 'uint16':  mat_type = "CV_16U"
    elif image.dtype == 'int16':   mat_type = "CV_16S"
    elif image.dtype == 'float32': mat_type = "CV_32F"
    elif image.dtype == 'float64': mat_type = "CV_64F"
    nchannel = 3 if image.ndim == 3 else 1

    ## depth, channel 출력
    print("%12s: depth(%s), channels(%s) -> mat_type(%sC%d)"
          % (name, image.dtype, nchannel, mat_type,  nchannel))
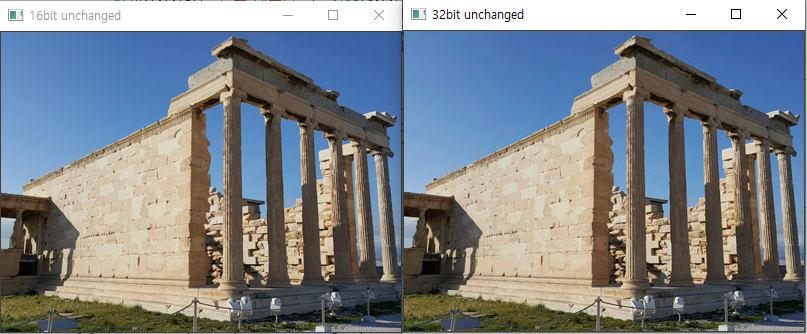
title1, title2 = "16bit unchanged", "32bit unchanged"  # 윈도우 이름
color2unchanged1 = cv2.imread("img/read_16.tif", cv2.IMREAD_UNCHANGED)
color2unchanged2 = cv2.imread("img/read_32.tif", cv2.IMREAD_UNCHANGED)
if color2unchanged1 is None or color2unchanged2 is None:
    raise Exception("영상파일 읽기 에러")
print("16/32비트 영상 행렬 좌표 (10, 10) 화소값")
print(title1, "원소 자료형 ",  type(color2unchanged1[10][10][0]))   # 원소 좌료형
print(title1, "화소값(3원소) ", color2unchanged1[10, 10] )           # 행렬 내 한 화소 값 표시
print(title2, "원소 자료형 ",  type(color2unchanged2[10][10][0]))
print(title2, "화소값(3원소) ", color2unchanged2[10, 10] )
print()
16/32비트 영상 행렬 좌표 (10, 10) 화소값
16bit unchanged 원소 자료형 <class 'numpy.uint16'>
16bit unchanged 화소값(3원소) [48573 34438 23387]
32bit unchanged 원소 자료형 <class 'numpy.float32'>
32bit unchanged 화소값(3원소) [0.7456989 0.52237624 0.36376417]
print_matInfo(title1, color2unchanged1)         # 행렬 정보 출력
print_matInfo(title2, color2unchanged2)
16bit unchanged: depth(uint16), channels(3) -> mat_type(CV_16UC3)
32bit unchanged: depth(float32), channels(3) -> mat_type(CV_32FC3)
cv2.imshow(title1, color2unchanged1)
cv2.imshow(title2, (color2unchanged2*255).astype("uint8"))
cv2.waitKey(0)
행렬 영상 저장 01
압축 방식에 사용되는 params 인수 튜플의 예시
- cv2.IMWRITE_JPEG_QUALITY (paramValue : 0~100(defualt: 95) : JPG 파일 화질, 높은 값일수록 화질이 좋다
- cv2.IMWRITE_PNG_COMPRESSION (paramValue : 0 ~ 9(defualt: 3)) : PNG 파일 압축 레벨, 높은 값일수록 용량은 적어지고, 압축 시간이 길어짐
- cv2.IMWRITE_PXM_BINARY(paramValue : 0 or 1(defualt: 1)) : PPM,PGM 파일의 이진 포맷 설정
import cv2
image = cv2.imread("img/read_color.jpg", cv2.IMREAD_COLOR)
if image is None:
    raise Exception("파일 읽기 에러")
params_jpg = (cv2.IMWRITE_JPEG_QUALITY, 10)        # JPEG 화질 설정
params_png = [cv2.IMWRITE_PNG_COMPRESSION, 9]       # PNG 압축 레벨 설정
## 행렬을 영상 파일로 저장
cv2.imwrite("img/write_test1.jpg", image)       # 디폴트는 95
cv2.imwrite("img/write_test2.jpg", image, params_jpg) # 지정 화질로 저장 (저화질)
cv2.imwrite("img/write_test3.png", image, params_png)
cv2.imwrite("img/write_test4.bmp", image)         # BMP 파일로 저장
print("저장 완료")
저장 완료
write_test1.jpg

행렬 영상 저장 02
import numpy as np
import cv2
image8 = cv2.imread("img/read_color.jpg", cv2.IMREAD_COLOR)
if image8 is None: raise Exception("영상파일 읽기 에러") 	# 영상 파일 예외처리
image16 = np.uint16(image8 * (65535/255))       # 형변환 및 화소 스케일 조정
image32 = np.float32(image8 * (1/255))
# 화소값을 확인하기 위한 관심 영역(10,10 위치에서 2x3 크기) 출력
print("image8 행렬의 일부\n %s\n"  % image8[10:12, 10:13])
print("image16 행렬의 일부\n %s\n" % image16[10:12, 10:13])
print("image32 행렬의 일부\n %s\n" % image32[10:12, 10:13])
image8 행렬의 일부
[[[189 134 91]
[189 134 91]
[189 134 91]]
[[189 134 91]
[189 134 91]
[189 134 91]]]
image16 행렬의 일부
[[[48573 34438 23387]
[48573 34438 23387]
[48573 34438 23387]]
[[48573 34438 23387]
[48573 34438 23387]
[48573 34438 23387]]]
image32 행렬의 일부
[[[0.7411765 0.5254902 0.35686275]
[0.7411765 0.5254902 0.35686275]
[0.7411765 0.5254902 0.35686275]]
[[0.7411765 0.5254902 0.35686275]
[0.7411765 0.5254902 0.35686275]
[0.7411765 0.5254902 0.35686275]]]
cv2.imwrite("images/write_test_16.tif", image16)
cv2.imwrite("images/write_test_32.tif", image32)
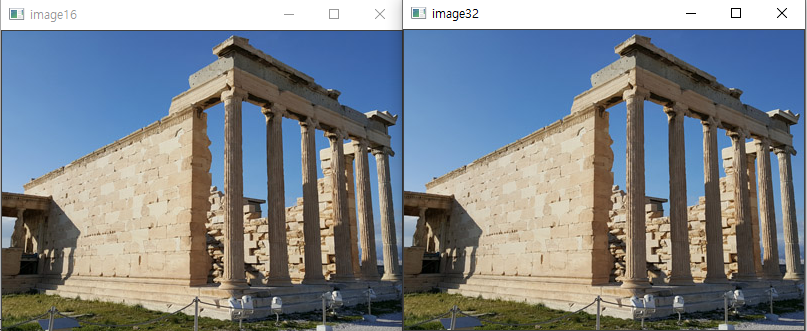
cv2.imshow("image16", image16)
cv2.imshow("image32", (image32*255).astype("uint8"))
cv2.waitKey(0)
'Image Processing > OpenCV' 카테고리의 다른 글
| [OpenCV] 01. 화소 처리 (0) | 2022.11.22 |
|---|---|
| [OpenCV] 산출 연산 함수 (0) | 2022.11.21 |
| [OpenCV] 기본 배열 연산 (Operations On Arrays) (0) | 2022.11.19 |
| [OpenCV] VideoCapture (0) | 2022.11.15 |
| [OpenCV] 사용자 인터페이스 (0) | 2022.11.09 |


댓글